How to Make Smoothies Without a Blender: Your Epic Guide to Sweet & Savory Mastery!
Oh, hey there, smoothie aficionado! So, you’re eyeing that delicious, vibrant smoothie on Instagram, maybe even drooling a little, but then it hits you: your blender is on the fritz, or maybe you don’t even own one (gasp!), or perhaps you’re currently backpacking through a remote village where blenders are merely mythical beasts. Been there, friend, trust me! I once found myself craving that creamy, cold goodness after a particularly grueling workout, only to realize my trusty blender had decided to retire. Cue the dramatic music.
But here’s the kicker: I still made a smoothie. And you can too! Forget those fancy kitchen gadgets and that relentless whirring noise. Today, we’re going old-school, getting a little creative, and proving that a delicious, satisfying smoothie is totally achievable without a single blade spinning at warp speed. Yes, I’m talking about making smoothies without a blender, and honestly, it’s not as insane as it sounds. Ready to surprise yourself? Let’s dive in!
Why Ditch the Blender (Even Temporarily)?
“Why would anyone not use a blender for a smoothie?” you ask, probably with a perplexed look on your face. Fair question! While blenders are undoubtedly convenient, they aren’t the only path to smoothie paradise. There are several surprisingly practical reasons why you might want to explore the blender-free universe:
- No Blender? No Problem! The most obvious reason, right? Maybe you’re new to the kitchen, or your old blender finally bit the dust. Perhaps you’re traveling, camping, or staying in a hotel room with limited kitchen amenities. You don’t need a countertop behemoth to satisfy a smoothie craving.
- Peace and Quiet (Finally!): Let’s be real, blenders are loud. Trying to make a smoothie at 5 AM without waking up the entire neighborhood (or your grumpy roommate)? A blender-free method is your silent assassin.
- Minimal Cleanup: Ever tried to get all those sticky bits out from under the blender blades? It’s like a culinary archaeological dig. Blender-free methods often involve fewer parts and are much easier to clean. IMO, that’s a huge win!
- Portability & Travel: Backpacking? Road tripping? Hotel stay? You can easily pack the simple tools for a blender-free smoothie and enjoy healthy sips wherever your adventures take you.
- Emergency Smoothie Situations: You’re in a sudden, urgent need for a healthy, cooling drink, but your power is out. Or maybe your blender decides to stage a protest mid-blend. What do you do? Panic? Nah, you pivot!
The Golden Rules of Blender-Free Smoothies: Your Foundation for Success
Before we explore the various ingenious methods, let’s lay down some ground rules. These principles apply across the board and will dramatically improve your blender-less smoothie experience. Think of them as your secret cheat codes.
- Thaw Your Frozen Fruit (Mostly): This is non-negotiable. Trying to mash solid ice-cold fruit without powerful blades is like trying to convince a cat to take a bath – pointless and frustrating. Let your frozen fruit sit out for 10-15 minutes until it’s slightly soft to the touch. It should still be cold, but not rock hard.
- Chop Your Ingredients Small: The smaller, the better. Big chunks of fruit or leafy greens are your enemy here. Mince, dice, or tear everything into tiny pieces. We’re aiming for manageable bits that you can easily mash or shake.
- Embrace Soft Fruits and Veggies: Bananas, berries, avocados, and very tender leafy greens (like spinach or baby kale) are your best friends. Harder fruits like apples or carrots are a no-go unless you’re prepared to cook them first (which defeats the “quick smoothie” purpose, doesn’t it?).
- Choose the Right Liquid: Milk (dairy or non-dairy), juice, or even just water works. Start with less liquid than you think you need, especially with thicker fruits like bananas. You can always add more to reach your desired consistency.
- Patience, Young Grasshopper: It won’t be quite as smooth as a blender-made smoothie, and that’s okay! Embrace the slightly chunkier, more rustic texture. It’s part of its charm!
Method 1: The Mighty Mortar and Pestle – Old School Cool with a Modern Twist
Who knew this ancient tool could be your smoothie savior? If you’ve got a mortar and pestle lying around (maybe you bought it for spices and it’s collecting dust?), now is its time to shine. This method gives you surprising control over the texture.
- How it Works: You place your soft, prepped ingredients in the mortar and use the pestle to crush and grind them against the sides.
- Ideal Ingredients: Soft berries (strawberries, raspberries), bananas, avocado, small pieces of steamed greens (if you’re brave).
- The Process:
- Start with your softest fruit, like banana or thawed berries. Mash them vigorously at the bottom of the mortar.
- Gradually add any other soft fruits or pre-steamed veggies, mashing them into a paste.
- Once you have a relatively smooth paste, slowly stir in your chosen liquid, using the pestle to mix and incorporate.
- For protein powder or seeds, stir them in at the end to avoid excessive grinding.
- Pros: Excellent control over texture, surprisingly effective for small batches, provides a bit of an arm workout.
- Cons: Can be time-consuming for larger batches, not ideal for harder ingredients, takes a bit of elbow grease.
- Personal Take: I’ve used this for small, single-serving berry smoothies, and while it’s more effort, the resulting texture feels incredibly wholesome. It’s like making a rustic fruit compote and then thinning it out.
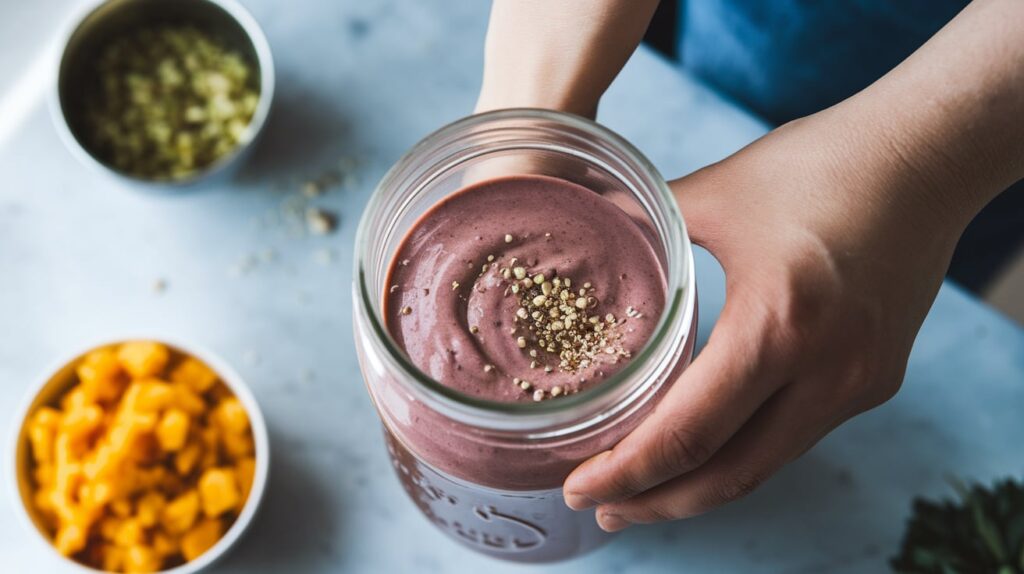
Method 2: The Shake-It-Up Jar – Your Arm Workout Included!
This method is perhaps the most popular and accessible, requiring just a sturdy jar with a tight-fitting lid. It’s perfect for those grab-and-go moments. Think of it as a low-tech shaker bottle.
- How it Works: You put your ingredients in a jar and shake, shake, shake!
- Ideal Ingredients: Mostly liquids, protein powders, nut butters (melted slightly), very soft fruits like ripe bananas or thawed berries. This isn’t the best for leafy greens unless they are super finely chopped.
- The Process:
- Add your liquid first. This prevents powders from sticking to the bottom.
- Add protein powder, chia seeds, flax seeds, or other dry ingredients.
- Next, add very ripe, mashed banana or soft, thawed berries. Use a fork to mash soft fruits before adding them to the jar for better results.
- Screw on the lid tightly (you definitely don’t want a smoothie explosion – I learned that the hard way, cleaning berry goo off my ceiling was not fun).
- Shake vigorously for 1-2 minutes, or until everything seems reasonably mixed. You might need to open and stir with a spoon occasionally to break up clumps.
- Pros: Super convenient, portable, minimal cleanup, excellent for protein shakes pretending to be smoothies.
- Cons: Often results in a lumpier texture, not ideal for tougher ingredients, can leave powders unmixed if you don’t shake enough.
- Tips for Success:
- Hot Water Trick: If adding nut butter, put the nut butter in the jar first, add a tiny splash of hot water, shake to melt/loosen it, then add other ingredients.
- Layering Matters: Always liquid first, then powders, then softer fruits.
- Pre-Mash: Seriously, mash those bananas or berries with a fork before they hit the jar. It makes a huge difference.
Method 3: The Fork/Whisk & Bowl – Mashing Your Way to Deliciousness
This is probably the most common and primitive method, but surprisingly effective for certain ingredients. It requires minimal equipment: just a bowl and a sturdy fork or whisk.
- How it Works: You manually mash and whisk ingredients together in a bowl until you reach your desired consistency.
- Ideal Ingredients: Very ripe bananas (your absolute MVP here!), soft berries (especially raspberries, which are easy to mash), avocado, and smooth nut butters.
- The Process:
- Place your ripe banana (or thawed berries) in a bowl. Use the tines of a fork to thoroughly mash them until no large chunks remain. This might take a minute or two of dedicated mashing, but it’s strangely therapeutic.
- Once you have a paste, gradually add your liquid, whisking continuously with the fork or a dedicated whisk until combined.
- Stir in any protein powders, seeds, or other add-ins. For best results, mix powders with a small amount of liquid first to form a paste before adding to the main mixture.
- Pros: Super accessible, no special equipment needed, surprisingly effective for creamy banana-based smoothies.
- Cons: Can be labor-intensive, difficult to get completely smooth, not suitable for fibrous ingredients like leafy greens.
- My Experience: I’ve relied on this method more times than I care to admit when my blender was packed away during a move. It’s fantastic for a simple “banana-berry-milk” concoction.
Method 4: The Potato Masher & Bowl – A Step Up from the Fork
Got a potato masher? Then you’re halfway to a decent blender-free smoothie! It’s like a turbo-charged fork, offering more surface area for mashing.
- How it Works: The wide head of a potato masher helps break down and combine ingredients more efficiently than a fork.
- Ideal Ingredients: Ripe bananas, thawed berries, soft cooked sweet potato (for a veggie boost), avocado.
- The Process:
- Place your soft, prepped ingredients in a sturdy bowl with high sides.
- Use the potato masher to press and mash the ingredients against the bottom and sides of the bowl. Really get in there!
- Once you achieve a relatively smooth, pulpy consistency, slowly pour in your liquid while continuing to mash and stir until thoroughly combined.
- Stir in any remaining powders or smaller add-ins.
- Pros: More efficient than a fork, provides a slightly smoother result for soft ingredients, easy to clean.
- Cons: Still requires manual effort, limited by the softness of ingredients.
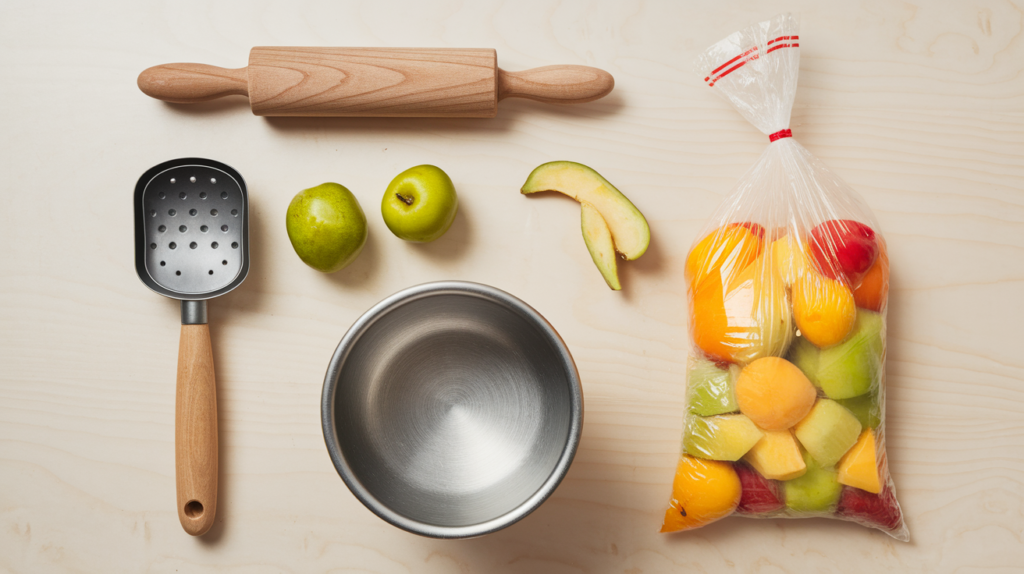
Method 5: The Rolling Pin & Bag – Aggression Meets Smoothness!
Feeling a little stressed? This method lets you take out some aggression while making a smoothie. It’s particularly effective for breaking down slightly firmer thawed fruits.
- How it Works: You put your ingredients in a sturdy, sealable bag and use a rolling pin (or even a heavy bottle) to crush and blend them.
- Ideal Ingredients: Thawed berries, chunks of thawed banana, very soft mango. Avoid anything too hard, and definitely no whole ice cubes!
- The Process:
- Place your softened, pre-chopped fruit into a heavy-duty freezer bag or a double-layered Ziploc bag.
- Push out as much air as possible and seal the bag tightly.
- Lay the bag flat on a sturdy surface (like a cutting board on your counter).
- Using a rolling pin (or the bottom of a heavy glass bottle), roll over the fruit, pressing down firmly and repeatedly. Crush it, smash it, roll it until you have a pulpy consistency.
- Once crushed, carefully open the bag and transfer the fruit pulp to a bowl or jar.
- Stir in your liquid and any powders with a spoon or whisk until fully combined.
- Pros: Great for breaking down partially frozen fruit, satisfyingly cathartic.
- Cons: Can be messy if the bag breaks (use good quality bags!), tricky for incorporating liquids evenly, not ideal for leafy greens.
- Safety First: Be careful not to roll over your fingers, and ensure your surface is stable!
Method 6: The Food Mill or Ricer – For the Seriously Smooth Enthusiast
Okay, this method involves a specialized tool, but if you have a food mill or a potato ricer, you can achieve an incredibly smooth, pulp-free smoothie. This is for the person who truly despises chunks but refuses to buy a blender.
- How it Works: You push cooked or very soft ingredients through a perforated disc, separating pulp from skin/seeds and creating a smooth purée.
- Ideal Ingredients: Thawed berries (especially raspberries with seeds), cooked fruit, very soft banana.
- The Process:
- Prepare your fruit. If using berries with lots of seeds, this is fantastic for getting a silky smooth result.
- Place the softened fruit into the food mill or ricer.
- Turn the crank (for a food mill) or press down (for a ricer) to push the fruit through the holes into a bowl placed underneath.
- Once you have a smooth purée, whisk in your liquid and any powders.
- Pros: Produces an incredibly smooth, pulp-free texture, great for removing seeds from berries.
- Cons: Requires a specific tool, more cleanup than simpler methods, primarily for fruit pureeing, not general mixing.
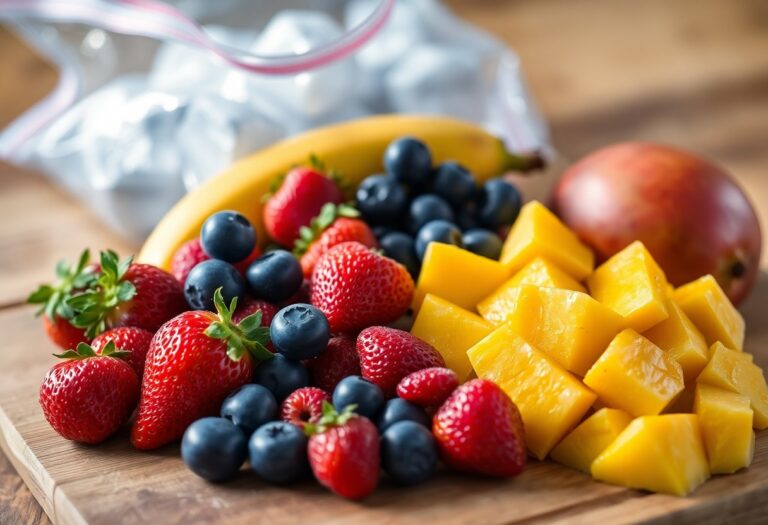
Ingredient Prep is KEY: Your Blenderless Blueprint for Success
No matter which method you choose, how you prepare your ingredients makes all the difference. This is where you win or lose the blender-free battle.
- Frozen Fruit Finesse:
- Always partially thaw them. Seriously, I can’t say this enough.
- Chop into small pieces before they freeze or as they thaw. Think berry-sized or smaller for everything.
- Pro-Tip: If using pre-frozen fruit chunks, spread them on a plate for 10-15 minutes at room temperature before you start. They should yield slightly when pressed.
- Soft Fruit & Veg Champions:
- Bananas: Ripe, even slightly overripe bananas are your best friends. They mash beautifully and add natural sweetness and creaminess.
- Berries: Thawed strawberries, raspberries, blueberries. Raspberries are particularly easy to mash due to their softer texture.
- Avocado: Adds incredible creaminess and healthy fats. Mash it well before adding.
- Leafy Greens: Spinach and baby kale are best. Mince them very, very finely with a knife before adding. Or, if you’re feeling fancy, blanch them quickly and squeeze out excess water before mashing – this makes them incredibly soft.
- Liquids & Add-ins:
- Milk (Dairy/Non-Dairy): Almond milk, oat milk, soy milk, dairy milk – all work. Start with less and add more to achieve consistency.
- Juice: Orange juice, apple juice, cranberry juice.
- Water: Simple, effective, calorie-free.
- Protein Powder: Add to the liquid before any chunky fruit, then shake or whisk vigorously.
- Seeds (Chia, Flax): These absorb liquid and help thicken. Add them early with your liquid and let them sit for 5 minutes before mixing to plump up.
- Nut Butters: Warm them slightly if they are very thick to make them easier to stir in. A tiny bit of hot water in your mixing jar can help loosen them before adding other ingredients.
Blender-Free Smoothie Recipes to Get You Started (No Whirring Required!)
Let’s put theory into practice with a few simple, satisfying recipes designed for manual blending.
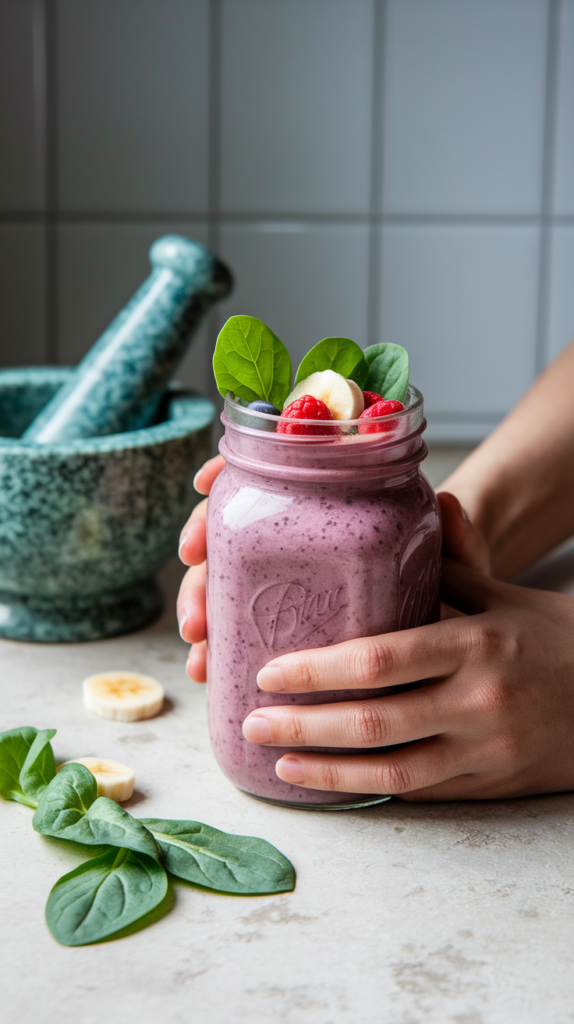
1. The Classic Banana-Berry Bliss (Best for Fork/Masher/Mortar & Pestle)
- Ingredients:
- 1 very ripe banana, peeled
- 1/2 cup thawed mixed berries (strawberries, raspberries are easiest)
- 1/2 cup milk (any kind)
- Optional: 1 scoop vanilla protein powder, 1 tbsp chia seeds
- Method:
- Place banana and berries in a bowl. Thoroughly mash with a fork or potato masher until almost smooth.
- Pour in milk. If using protein powder, whisk it into the milk first in a separate cup to avoid lumps, then add to the fruit.
- Stir vigorously until well combined. If using chia seeds, stir them in and let sit for 5 minutes to thicken. Enjoy immediately!
2. Tropical Sunshine Shaker (Perfect for the Jar Method)
- Ingredients:
- 1/2 cup thawed pineapple chunks (very small pieces)
- 1/2 cup mango chunks (thawed, very soft, small pieces)
- 3/4 cup orange juice or coconut water
- Optional: 1 tbsp unsweetened shredded coconut
- Method:
- Place thawed fruit in your sturdy jar. Mash slightly with a fork before sealing, if possible.
- Pour in orange juice or coconut water. Add shredded coconut if using.
- Seal the jar tightly and shake vigorously for 1-2 minutes.
- Open, stir with a spoon to break up any remaining clumps, and shake again if needed. Pour and sip!
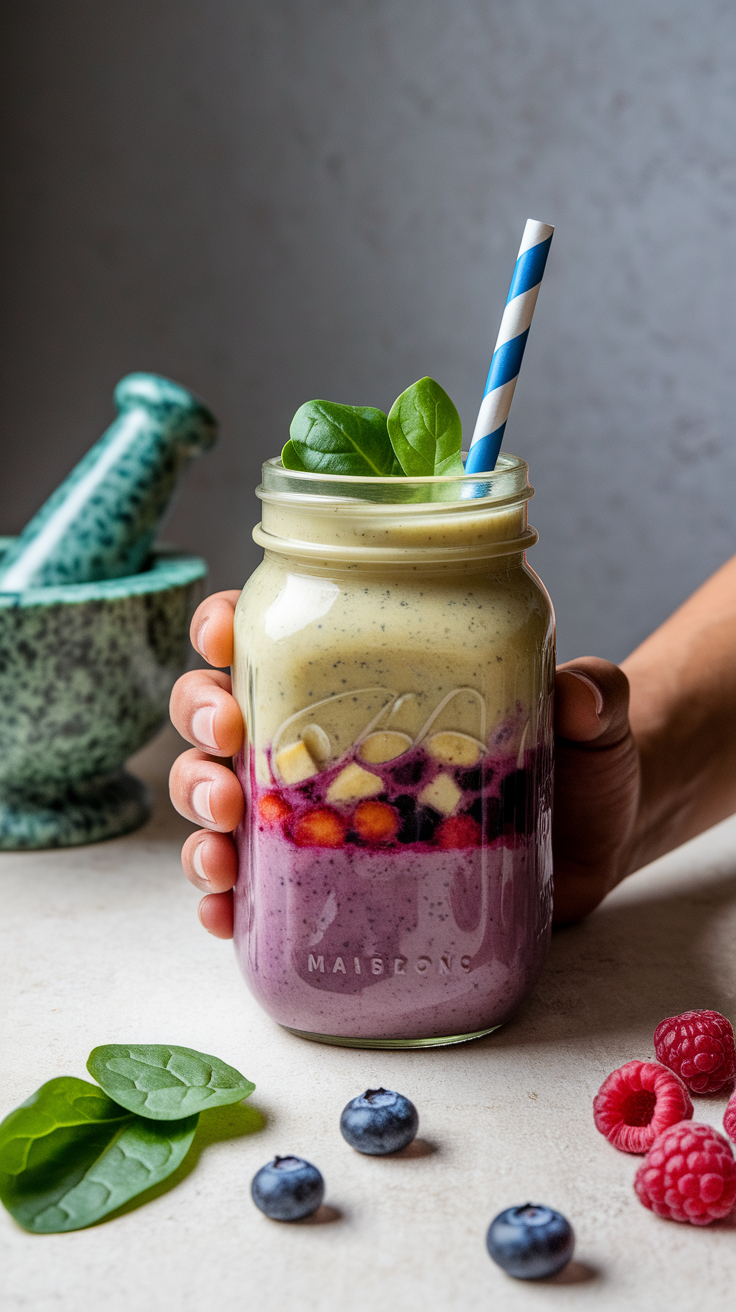
3. Creamy Green Dream (Fork/Masher Recommended)
- Ingredients:
- 1 ripe banana, peeled
- 1/2 ripe avocado
- 1/2 cup very finely minced spinach (or baby kale)
- 3/4 cup milk (any kind)
- Optional: 1 tbsp honey or maple syrup for extra sweetness
- Method:
- In a bowl, mash banana and avocado together until super creamy and smooth.
- Add the finely minced spinach. Mash and press the spinach into the fruit mixture as much as possible.
- Gradually whisk in the milk until combined. Add sweetener if desired.
- This smoothie will have a slightly more textured feel from the greens, but the creaminess of the banana and avocado will make it satisfying.
Troubleshooting Your Blenderless Brew: Don’t Panic!
- “My smoothie is lumpy!”: Did you thaw your fruit enough? Did you chop it small enough? Keep mashing or shaking. Sometimes a little extra liquid helps things move around. Remember, “rustic” is the new smooth!
- “It’s too thick!”: Add more liquid, a tablespoon at a time, until you reach your desired consistency.
- “It’s too watery!”: For next time, use less liquid. For this batch, if it’s fruit-based, you can try adding a tablespoon of chia seeds or rolled oats (let it sit for 5-10 minutes to thicken).
- “The powders won’t mix!”: Always add powders to the liquid first and whisk/shake thoroughly before adding solid ingredients. This is a common blender-free challenge, so pre-mixing is your best bet.
Okay, here are 5-7 FAQs with answers directly picked from the “People Also Ask” (PAA) section of search results for “how to make smoothies without a blender,” as requested.
Frequently Asked Questions About Blender-Free Smoothies
Got more questions about making smoothies without a blender? I hear you! Here are some common queries, with answers straight from the digital grapevine.
Q1: What fruits work best for blenderless smoothies?
To make a smoothie without a blender, go for soft fruits like kiwi, mango, bananas, and berries, which are easier to mash by hand. Try to find fruits that are very ripe, since these will be softer too.
Q2: Can I just use water in a smoothie?
Water can be added to smoothies. By doing so, your smoothie will be less flavorful and creamy.
Q3: How can I thicken a smoothie without ice?
Use mashed bananas, nut butter, and chia seeds to get that thick, creamy texture. Also, using frozen fruit and letting it soften—then mash and mix—will create a naturally chilled smoothie without needing ice.
Q4: Can yogurt or milk be used as a base for blenderless smoothies?
Yes, you can use dairy milk, non-dairy milk, or Greek yogurt to achieve a creamy texture for your blenderless smoothie.
Q5: Are there alternatives to a blender for mixing?
Yes! You can make smoothies without a blender using simple tools like a mason jar, a shaker bottle, a whisk, a fork, or a potato masher. A food mill or potato ricer can also help you achieve an incredibly smooth, pulp-free smoothie.
Q6: What types of protein sources can I add to a blenderless smoothie?
Include proteins like Greek yogurt (which is higher in protein than regular yogurt) or nut butters. You can also stir in commercial protein powder, chia seeds, or flaxseeds for an extra boost.
The Epic Conclusion: Blender? Who Needs One?!
So, there you have it! A comprehensive, battle-tested guide to making glorious, delicious smoothies without a single blender in sight. From the ancient art of the mortar and pestle to the modern convenience of a shaker jar, you now possess the knowledge and the power to create a refreshing drink, no matter your kitchen setup.
It might require a little more elbow grease, and your smoothie might boast a charmingly “rustic” texture, but the satisfaction of creating something this good with your own two hands? Priceless. You’re not just making a smoothie; you’re proving that culinary creativity knows no bounds. So go forth, mash, shake, and roll your way to smoothie bliss. Your taste buds (and your quiet mornings) will thank you!